When you’re obsessed with efficiency, like I am, every extra second you shave off your routine absolutely adds up.
And even if you aren’t a full-time productivity-seeking super-nerd, some simple adjustments to your mobile-tech setup can go a surprisingly long way.
One of the best places to give yourself a time-saving boost is in your smartphone’s keyboard. Much as we’ve grown accustomed to it over time, text input on a touchscreen is inherently awkward and often an ergonomic disaster.
But Google’s Gboard Android keyboard — my favorite Android keyboard app and the one I recommend for most people — has some awesome advanced options for improving its presence and making it easier and more natural to use for your specific style of typing.
Each adjustment will take you less than a minute to make. And once you figure out which exact setup works best for you, it’ll save you countless seconds all throughout your day.
[Psst: Love shortcuts? My Android Shortcut Supercourse will teach you tons of time-saving tricks for your phone. Sign up now for free!]
Ready?
Gboard Android adjustment #1: Custom keyboard height
Our first Gboard Android adjustment is the newest addition of all, and it seems to be available for most Android phone-owners at this point.
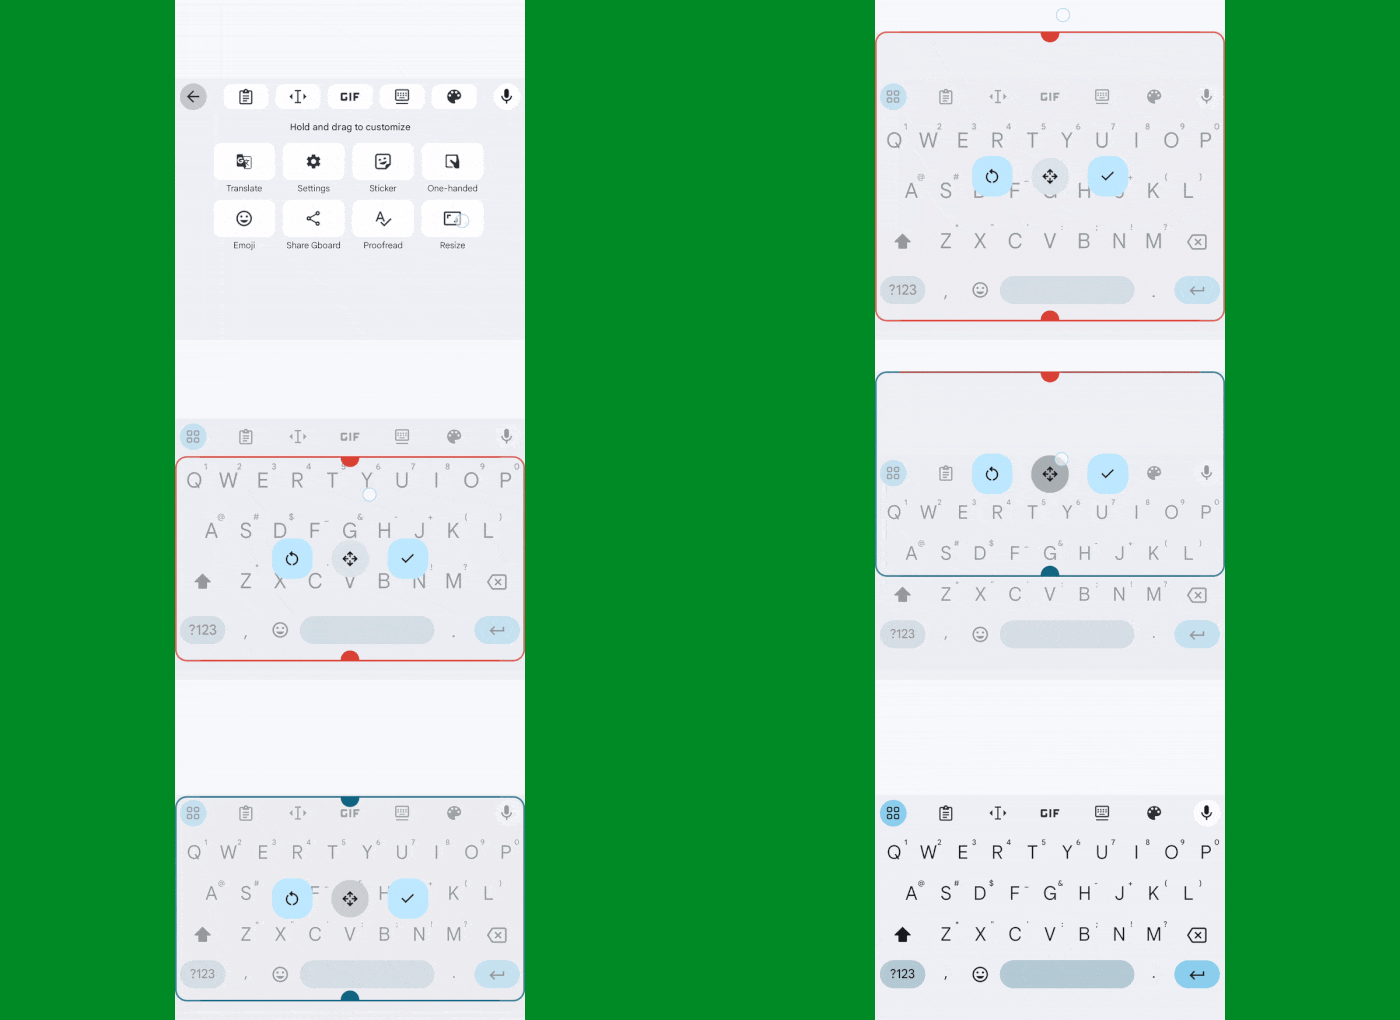
It’s a handy way to quickly change the height of your on-screen keyboard to make the keys larger and more spread out — or, conversely, to make the entire thing take up less of your visible space.
To try it out and find the just-right height for you:
- Tap on any text field to make Gboard appear.
- Look for the rectangle-shaped icon with arrows in its upper-left and lower-right corners in the top row of your keyboard. If you don’t see it there, tap the icon in Gboard’s upper-left corner to find it in the full menu of options.
- Tap that icon, then use your finger to slide the top or bottom of the keyboard up or down to make it taller or shorter.
- While you’re there, also press and hold the icon with four arrows pointing outward and slide the keyboard around until it lands on a spot you like.
- Be sure to tap the checkmark icon when you’re done to save your changes.
 JR
JRTaller, shorter. Taller, shorter. Slide, slide, slide.
Play around with the settings until you find the height and placement that feels most comfortable for you — then enjoy your freshly optimized Android typing experience.
Gboard Android adjustment #2: The floating keyboard
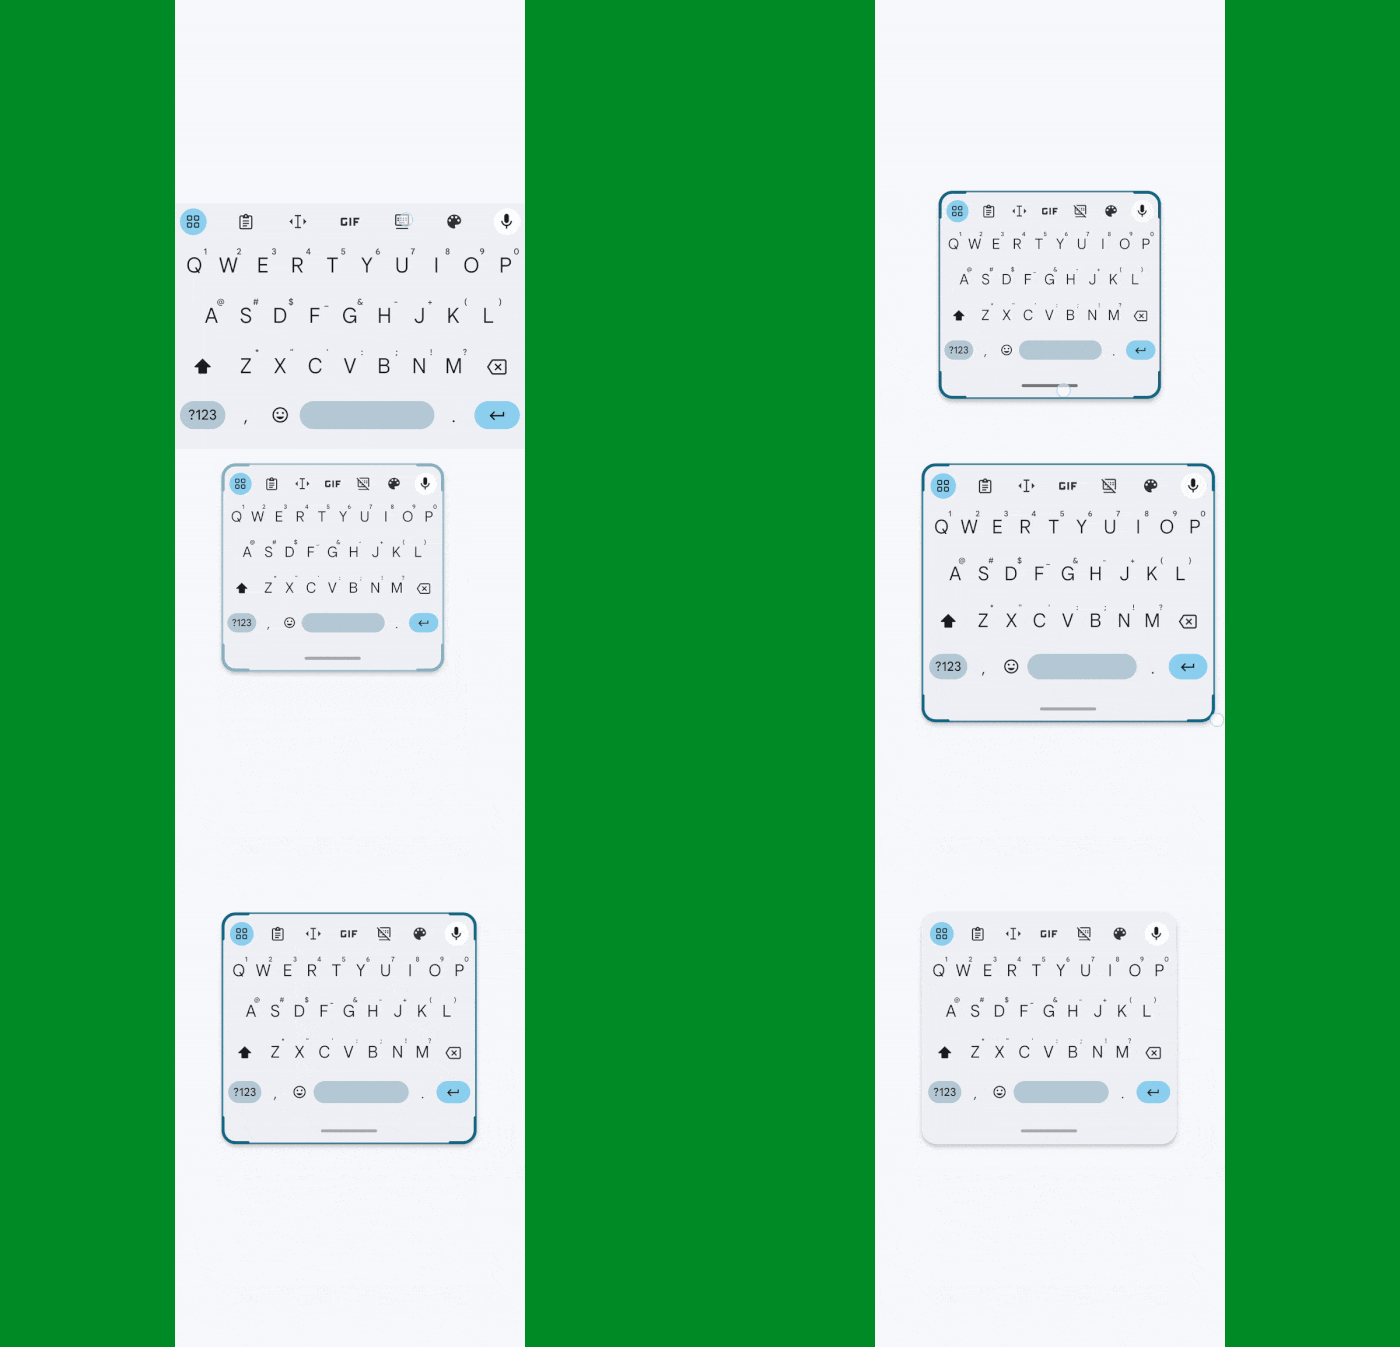
This next Gboard tweak takes the idea of shifting your keyboard’s form to even greater heights. It lets you completely detach Gboard from the bottom of your screen, adjust its size in not only height but also width, and plop it more or less anywhere you want on your display.
It can be supremely useful on just about any type of Android device, but it’s especially helpful on a tablet, foldable, or other large-screened contraption — where having the keyboard in a specific area of the screen can go a really long way in making it faster, easier, and more ergonomic to type.
And, just like our last one, it’s an incredibly easy adjustment to pull off:
- Once again, tap on any text field field to make Gboard appear.
- This time, look for the icon that resembles a keyboard with a line beneath it — or, if you’d rather, a funky little robot head — in the top row of your keyboard. And again, if you don’t see it there, tap the four-square icon in Gboard’s upper-left corner to find it in the full menu of options.
- Tap that funky ‘board-bot, then press and hold the horizontal line at the bottom of the keyboard to move it anywhere on your screen — and, once you let go, touch your finger to any corner of the keyboard and slide diagonally inward or outward to change the keyboard’s size.
 JR
JRMove Gboard anywhere you want — in any size.
If you ever decide you want to dock your keyboard back down into its default home, you can tap that same icon in its upper row once more — or, for an even faster (and more fun!) way to accomplish the same thing, simply slide Gboard down until it touches the bottom of your screen and then let go.
Good to know, no?
Gboard Android adjustment #3: One-handed optimization
If you tend to hold your phone with a single hand and type with those same associated appendages, this next Gboard adjustment is just for you.
With a couple quick taps, you can squeeze your on-screen Android keyboard over to the left or right side of your screen to make it even easier to access with whichever hand you’re using.
Here’s the trick:
- Tap on any text field to summon your old pal Gboard.
- Find the icon that looks like a hand holding a square-shaped taco. (All right, so it probably isn’t meant to be a square-shaped taco, specifically. But that’s my story, and I’m stickin’ with it.) If you don’t see it in Gboard’s top row, hit the icon in the keyboard’s upper-left corner to track it down.
- Once you’ve got it in front of you, tap that son-of-a-goober and tap it good, and your keyboard will shift over to either the left or right side of the screen. You can then change which side it aligns with by tapping the left- or right-facing arrow along its side.
 JR
JRTyping with a single hand has never been so simple.
And one more left — at least, for some of us…
Gboard Android adjustment #4: The screen splitter
Our final Gboard Android option is limited only to larger-screen devices — tablets and foldable phones, specifically, in their folded-out state.
In those environments, you can now split your keyboard into separate left- and right-aligned sections for (theoretically) simpler typing using only your thumbs.
To try it:
- Get Gboard in front of you. (You know how.)
- Look for the icon in its top row that shows a box with dots inside, split between the left and right sides.
- Tap that to switch to the split setup — and if you want to disable the split mode and go back to a standard keyboard configuration, tap that same icon (which will show the dots not being split apart, at this point) again.
 JR
JRGboard’s split-screen mode is divisive — but it’s up to you to decide if you want to use it.
And there ya have it: four adjustments to get your Android keyboard working the way you want.
Find the exact-right setup for your current device and personal typing preferences, and watch your mobile productivity soar.
Get six full days of advanced Android knowledge with my free Android Shortcut Supercourse. You’ll learn tons of time-saving tricks for your phone!
Copyright © 2023 IDG Communications, Inc.


