It’s safe to say that Apple has had a busy fall. The company introduced a slew of new features and products, covering everything from Apple hardware and software upgrades which brought us brand-new Apple Watches, iPhones and Apple Pencils. Most recently, the tech giant unveiled its brand-new M3 chip, the new 14-inch and 16-inch MacBook Pros and a refreshed version of the iMac at its “Scary Fast” event held at the end of October.
MacOS Sonoma‘s smaller updates didn’t get the pomp and circumstance from the tech giant that other updates and upgrades recieved this year, but the brand-new Macs hitting the scene this fall will shake things up. If you’re planning to upgrade to a new Mac and a new iPhone simultaneously, you’ll want to make sure they work in harmony.
If you plan on upgrading both your computer and your phone, there’s good news. MacOS Sonoma’s update brings features that iPhone users have enjoyed for several years, and some brand-new ones that iPhone users first saw in iOS 17.
Check out these new Mac features that I think make my phone and computer work better together. For more, check out how to fix the most annoying iOS 17 features and the Mac keyboard shortcuts you need to know.
Widgets come to your desktop
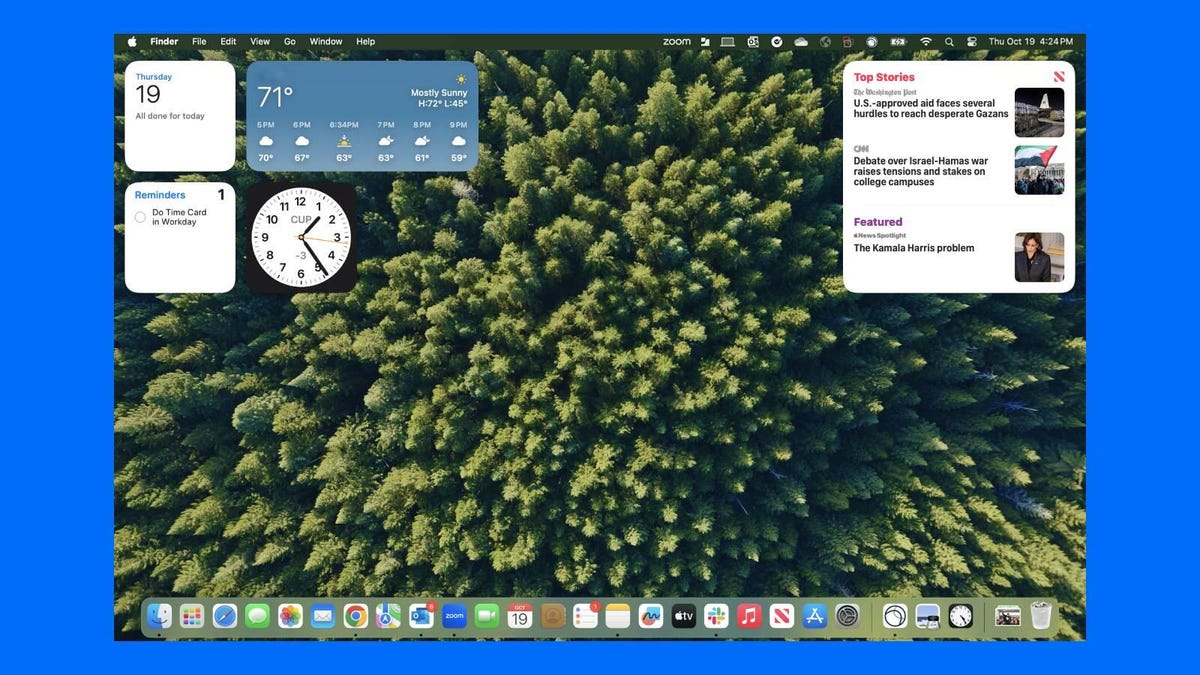
Widgets have finally arrived on your desktop.
While widgets aren’t an earth-shattering productivity feature, or even new to Apple fans, having them on your desktop is pretty helpful. For instance, some of my co-workers work on the West Coast while I work on the East Coast, so I have a clock widget that displays the current time in Pacific Standard Time, which makes coordinating with my coworkers a bit simpler.
The widgets are also super simple to use; all you have to do is right-click with your mouse or double-click your trackpad on your desktop and a menu will pop out. You can select Edit Widgets and a widget menu will appear where you can choose from small, medium or large widgets for a variety of applications. If you want to remove a widget, you can either right-click or use two fingers to click your trackpad and select Remove Widget, or you can click the small red button that appears after selecting Edit Widget to remove your widget.
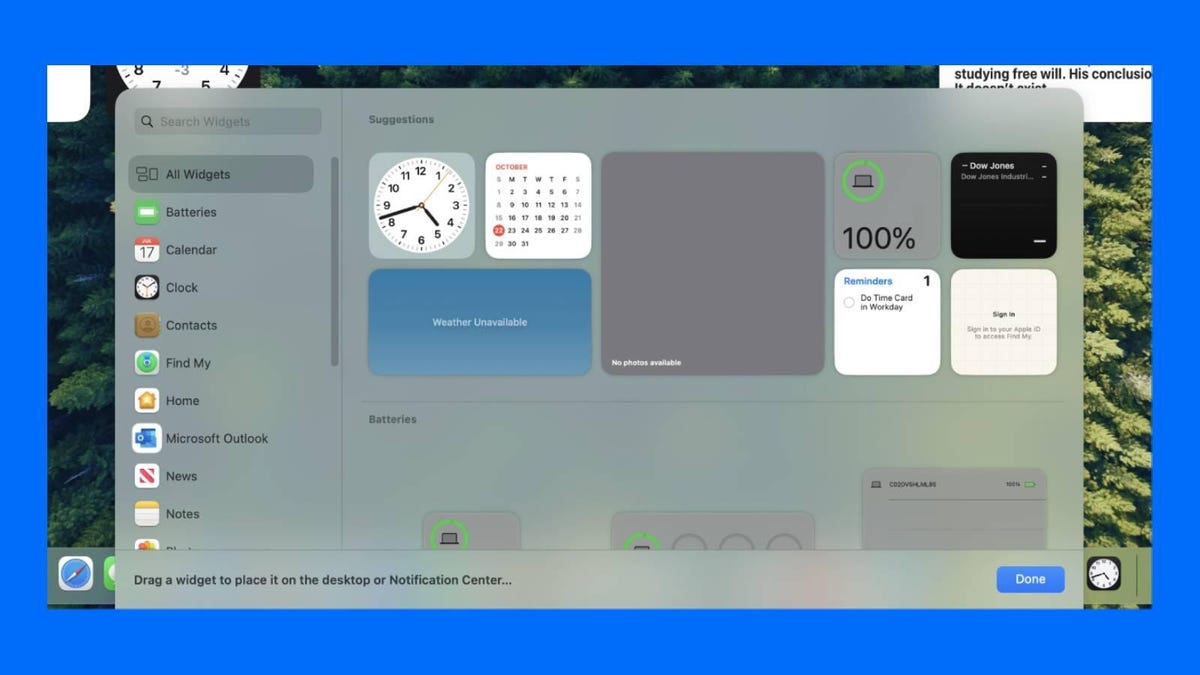
You can select all sorts of widgets to add to your desktop.
You can also drag and drop widgets from your Notification Center to your desktop. If you want to add widgets to your notification center, all you need to do is scroll to the bottom of your notification center and click Edit Widgets. You remove widgets from your notification center in the same way you would from your desktop.
You can also add your iPhone widgets to your Mac’s desktop, even if you don’t have the widget’s corresponding app downloaded to your computer. To enable this, you will need to go to System Settings, then scroll down to Desktop and Dock and from there scroll to the Widgets section. Once in the widgets section, simply toggle the Use iPhone Widgets option on. Your iPhone widgets will be available from the widget browser that appears when selecting Edit Widget on your desktop or notification center.
Auto-sorting grocery lists
I’m a pretty organized person, but to be honest, I’ve never turned to Apple’s Reminders app for help with this. The app didn’t make much sense to me and I traditionally have opted for third-party organization apps. While these new reminder features aren’t enough to sway me away from my preferred organization apps, some additions help me make better use of the app.
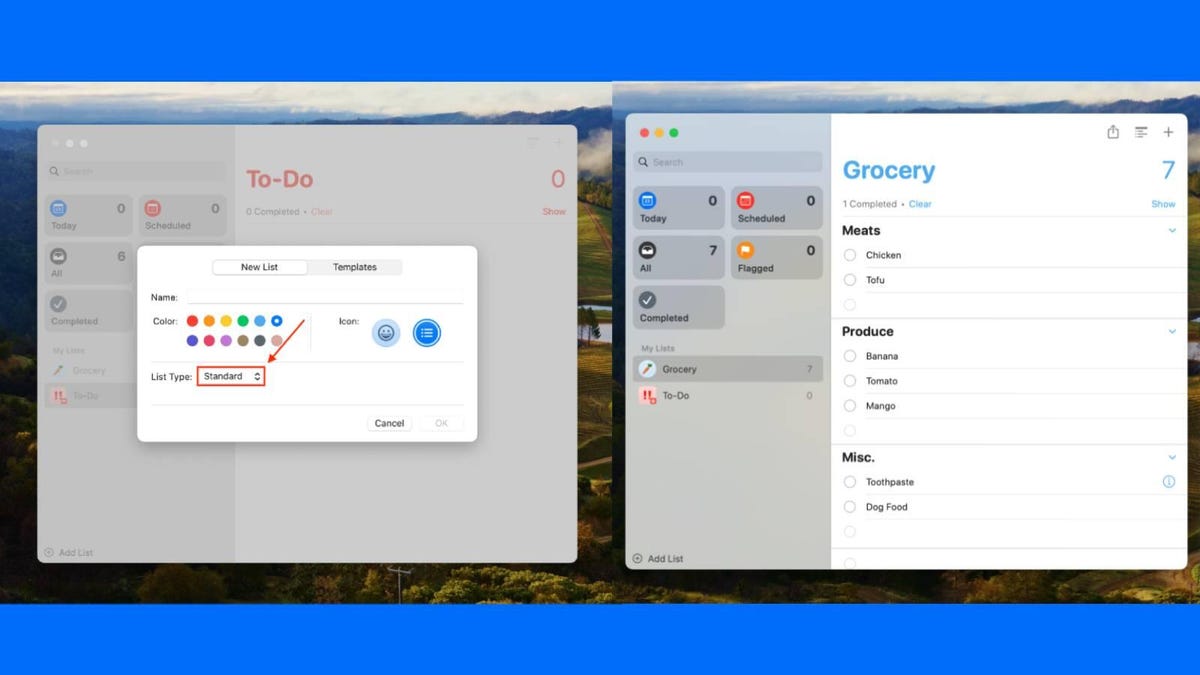
You can create auto-sorting grocery lists with Sonoma, but the feature can be tricky to use.
The changes to reminders are pretty easy to take advantage of. The most major update is the auto-sorting grocery list feature. To make use of this feature, click the Add List button at the bottom of the reminders page. Give your list a name (and change the color of the list and the icon if you’d like). Then, under the List Type drop-down menu, select Groceries.
Once in the list, create the categories you want for your list. For example, my list had three categories: meats, produce and miscellaneous. After you create your categories, you should be able to start putting your list together, and the items you add should be automatically sorted. Be warned — this feature seems to be a bit buggy. My best advice is to keep trying the feature, and you can always drag and drop your items to their correct category if nothing else works.
Messages that mirror your phone
One of my favorite things about having an Apple family of products is that I can text from my computer. This sounds small, but this has proven super-helpful in my day-to-day life. When I’m working on my computer, I can put my phone completely away so I can focus, but it’s nice to still be able to be reached.
One thing that has always frustrated me about iMessage on my computer is that it feels years behind my phone. For the longest time, I couldn’t use tap-back reactions or even reply to messages like I could when I would text on my phone. Sonoma has changed this for the better — there is finally parity between phones and computers when it comes to the iMessage experience.
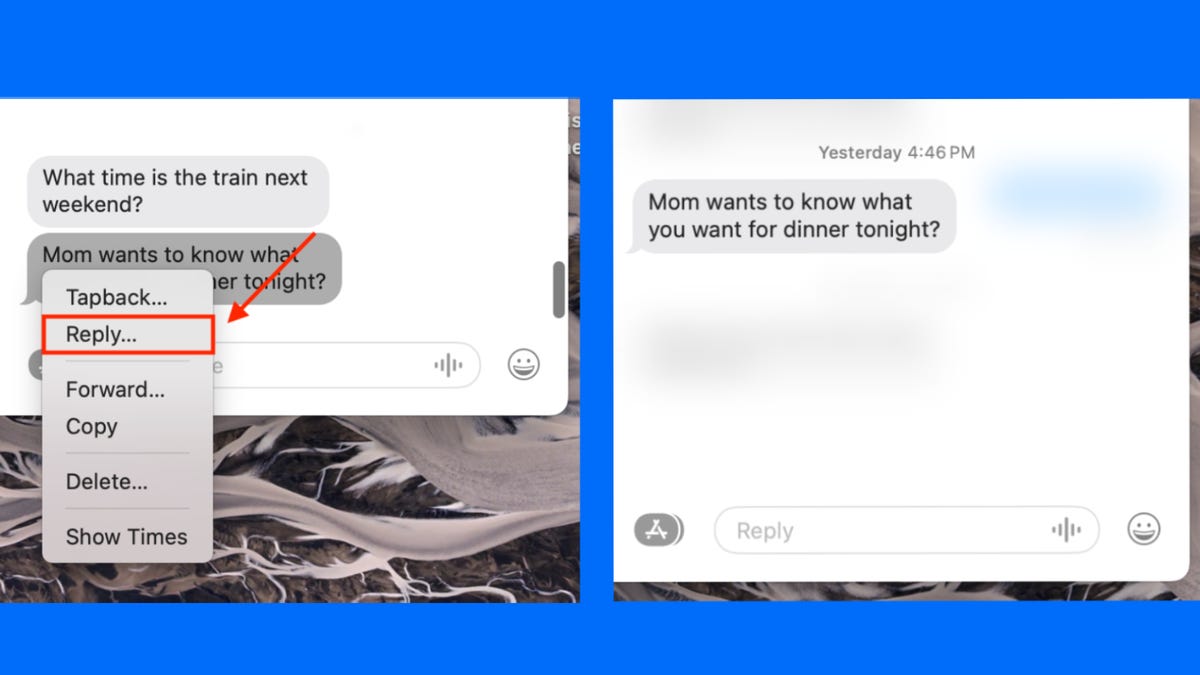
The reply function, which can help organize text threads, finally makes its way onto Macs
The biggest feature that I had been missing was the reply function. Essentially, this function allows you to swipe across a message and reply directly to that specific message. I’ve found this feature particularly helpful when making complicated plans or in noisy group chats.
All you have to do to use the reply function is swipe two fingers to the right until you can reply to the message. If you don’t want to swipe, you can click the message you wish to reply to with two fingers and select Reply from the drop-down menu.
For more, here’s the best MacBook of 2023.
