Aside from the addition of bedtime sleep schedules five years ago, Apple’s Clock app has largely been ignored with each new iOS software update. But that’s changing with Apple’s latest iPhone software. With the updated Clock app, you can finally set more than one timer to run at the same time.
Before the update, you’d normally have to use a third-party app to set one or more additional timers. Either that or rely on complicated shortcuts, physical timers, an iPad or Android tablet, or a HomePod or other type of smart speaker.
Personally, before I purchased a HomePod, I’d use a mix of devices to run timers simultaneously, including my iPhone, iPad, Echo Dot, Google Home, and oven timers. I like visual timers so I can quickly check them without having to say anything, so I’d usually limit smart speakers to one timer to prevent confusion — and I didn’t want an extra clock app on my iPhone.
This problem is finally solved in Apple’s next big software updates for iPhone and iPad. Now, I can set numerous timers at the same time and keep track of them in the Clock app or via Live Activities on the Lock Screen or Notification Center. Here’s how it works:
Step 1: Update Your Software
The new timer feature in Clock is only available on iOS 17 and iPadOS 17, which are currently in beta. If you want to get access to this and other features before the stable version drops this fall, join the iOS 17 beta or iPadOS 17 beta and install the latest build on your iPhone or iPad.
Step 2: Set Your First Timer
To set and start your first timer in the Clock app, open the Timers tab (previously the singular “Timer”), then set the desired hours, minutes, and seconds and change the When Timer Ends sound as you usually would.
What’s different here is that you can label each time. That way, you’re not confused over which timer was for what. You don’t need a label if you’re only setting one timer. Otherwise, tap the label field to enter a brief description, then press Start.
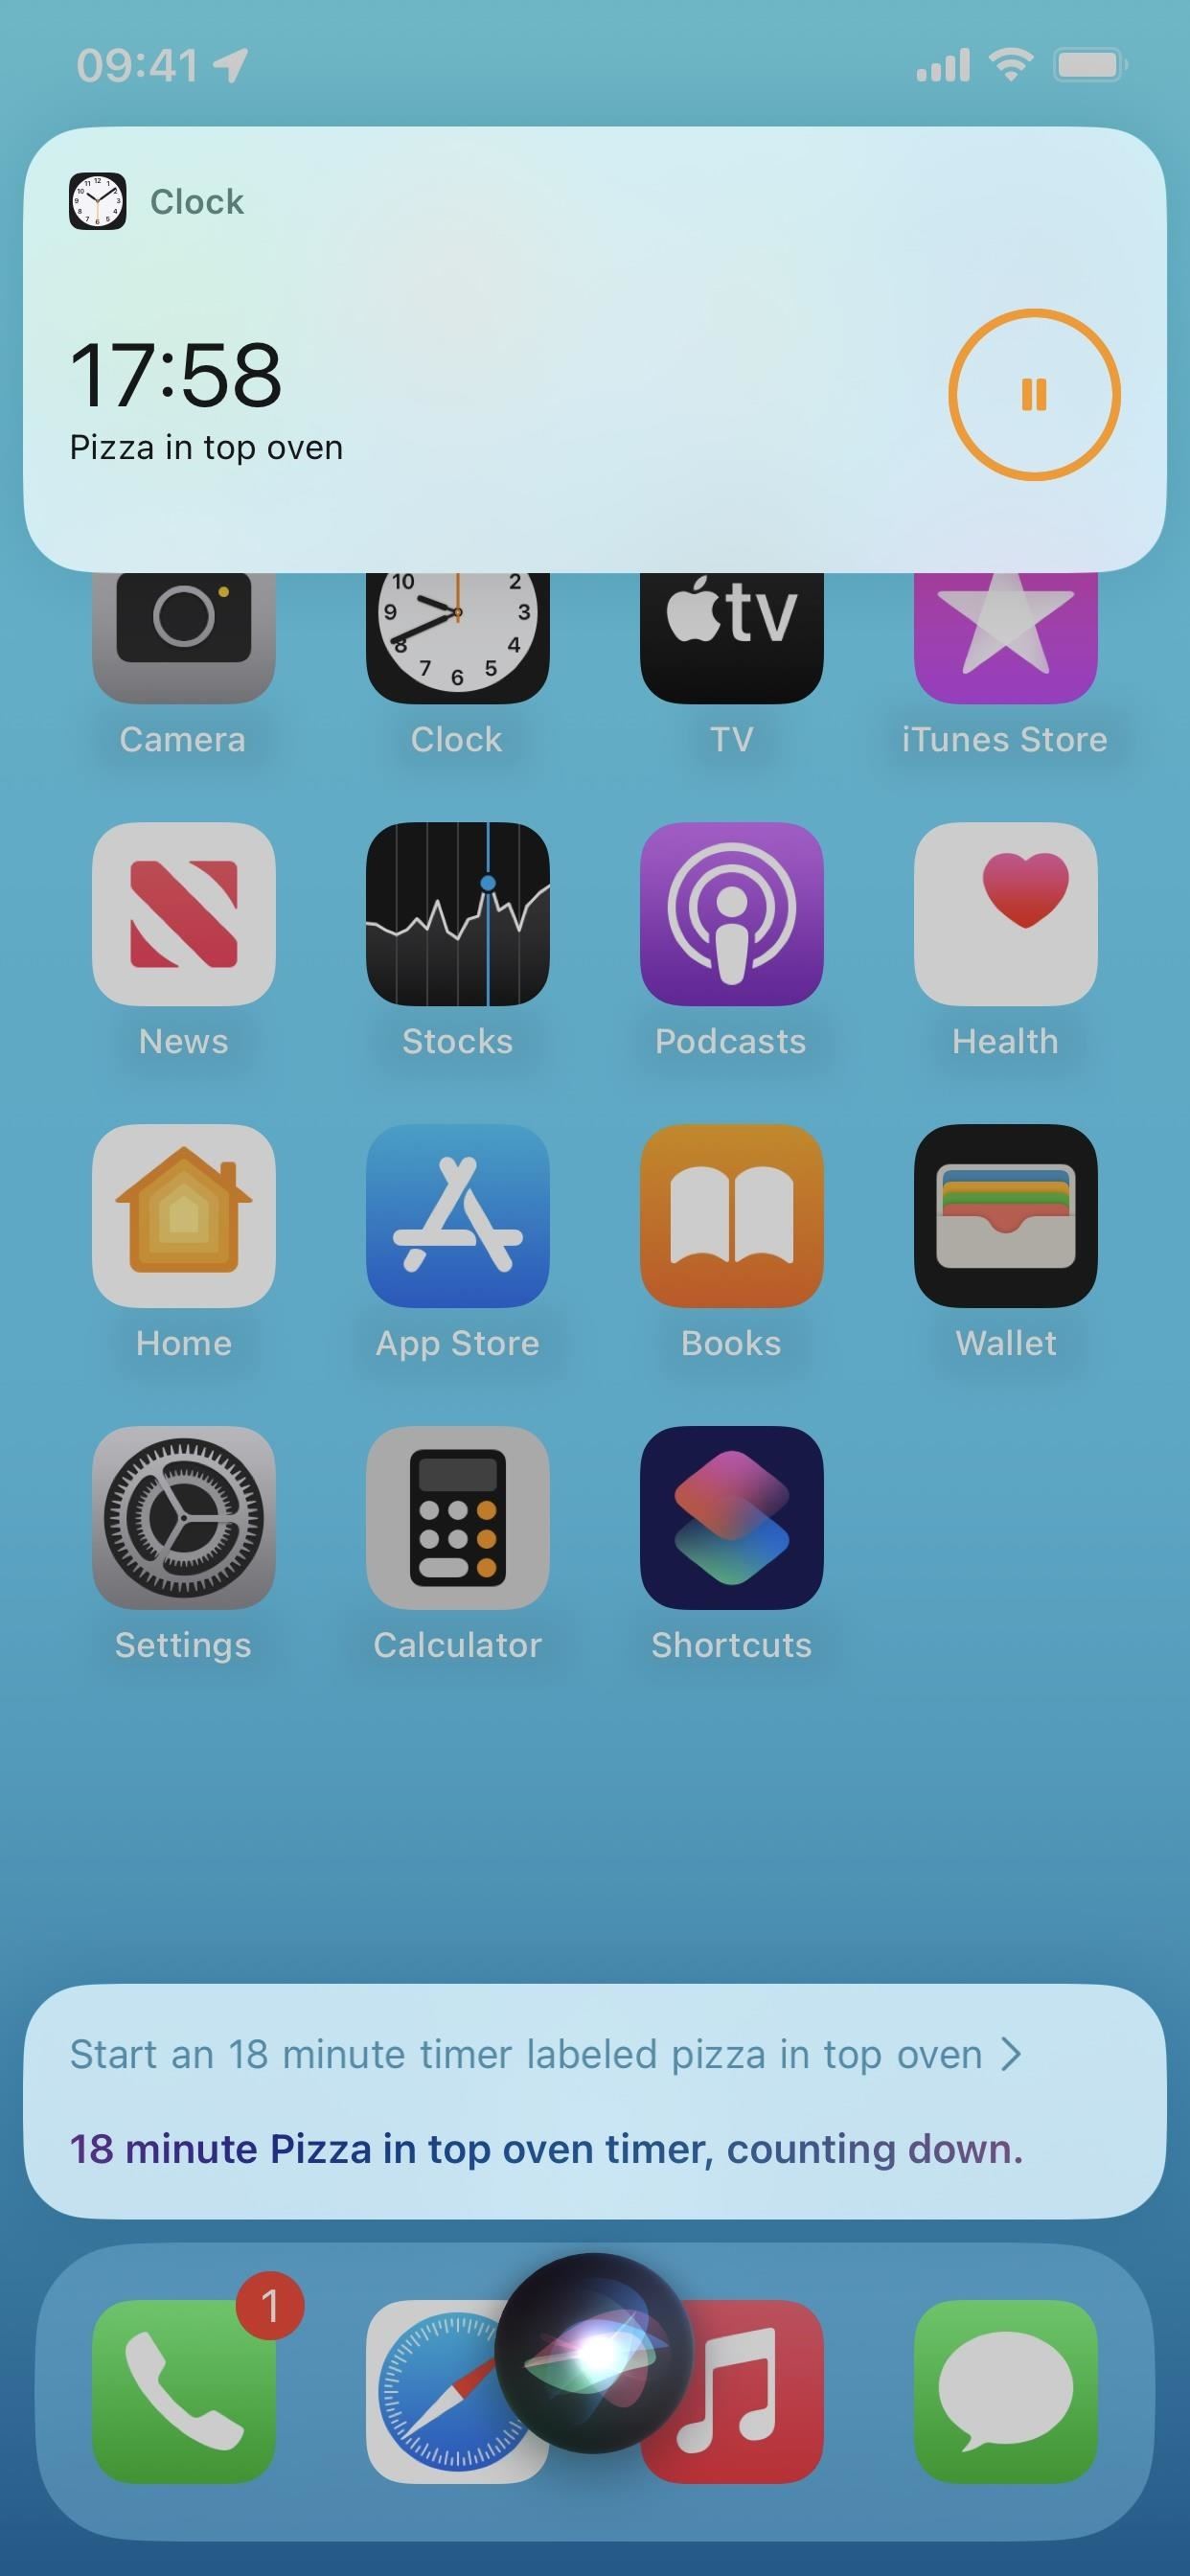
You can also tell Siri to start the first timer for you. If you want a label, specify it in the command. Once created, Siri will show you a preview, and tapping the preview will open the Clock app to the Timers tab.


Step 3: Add More Timers
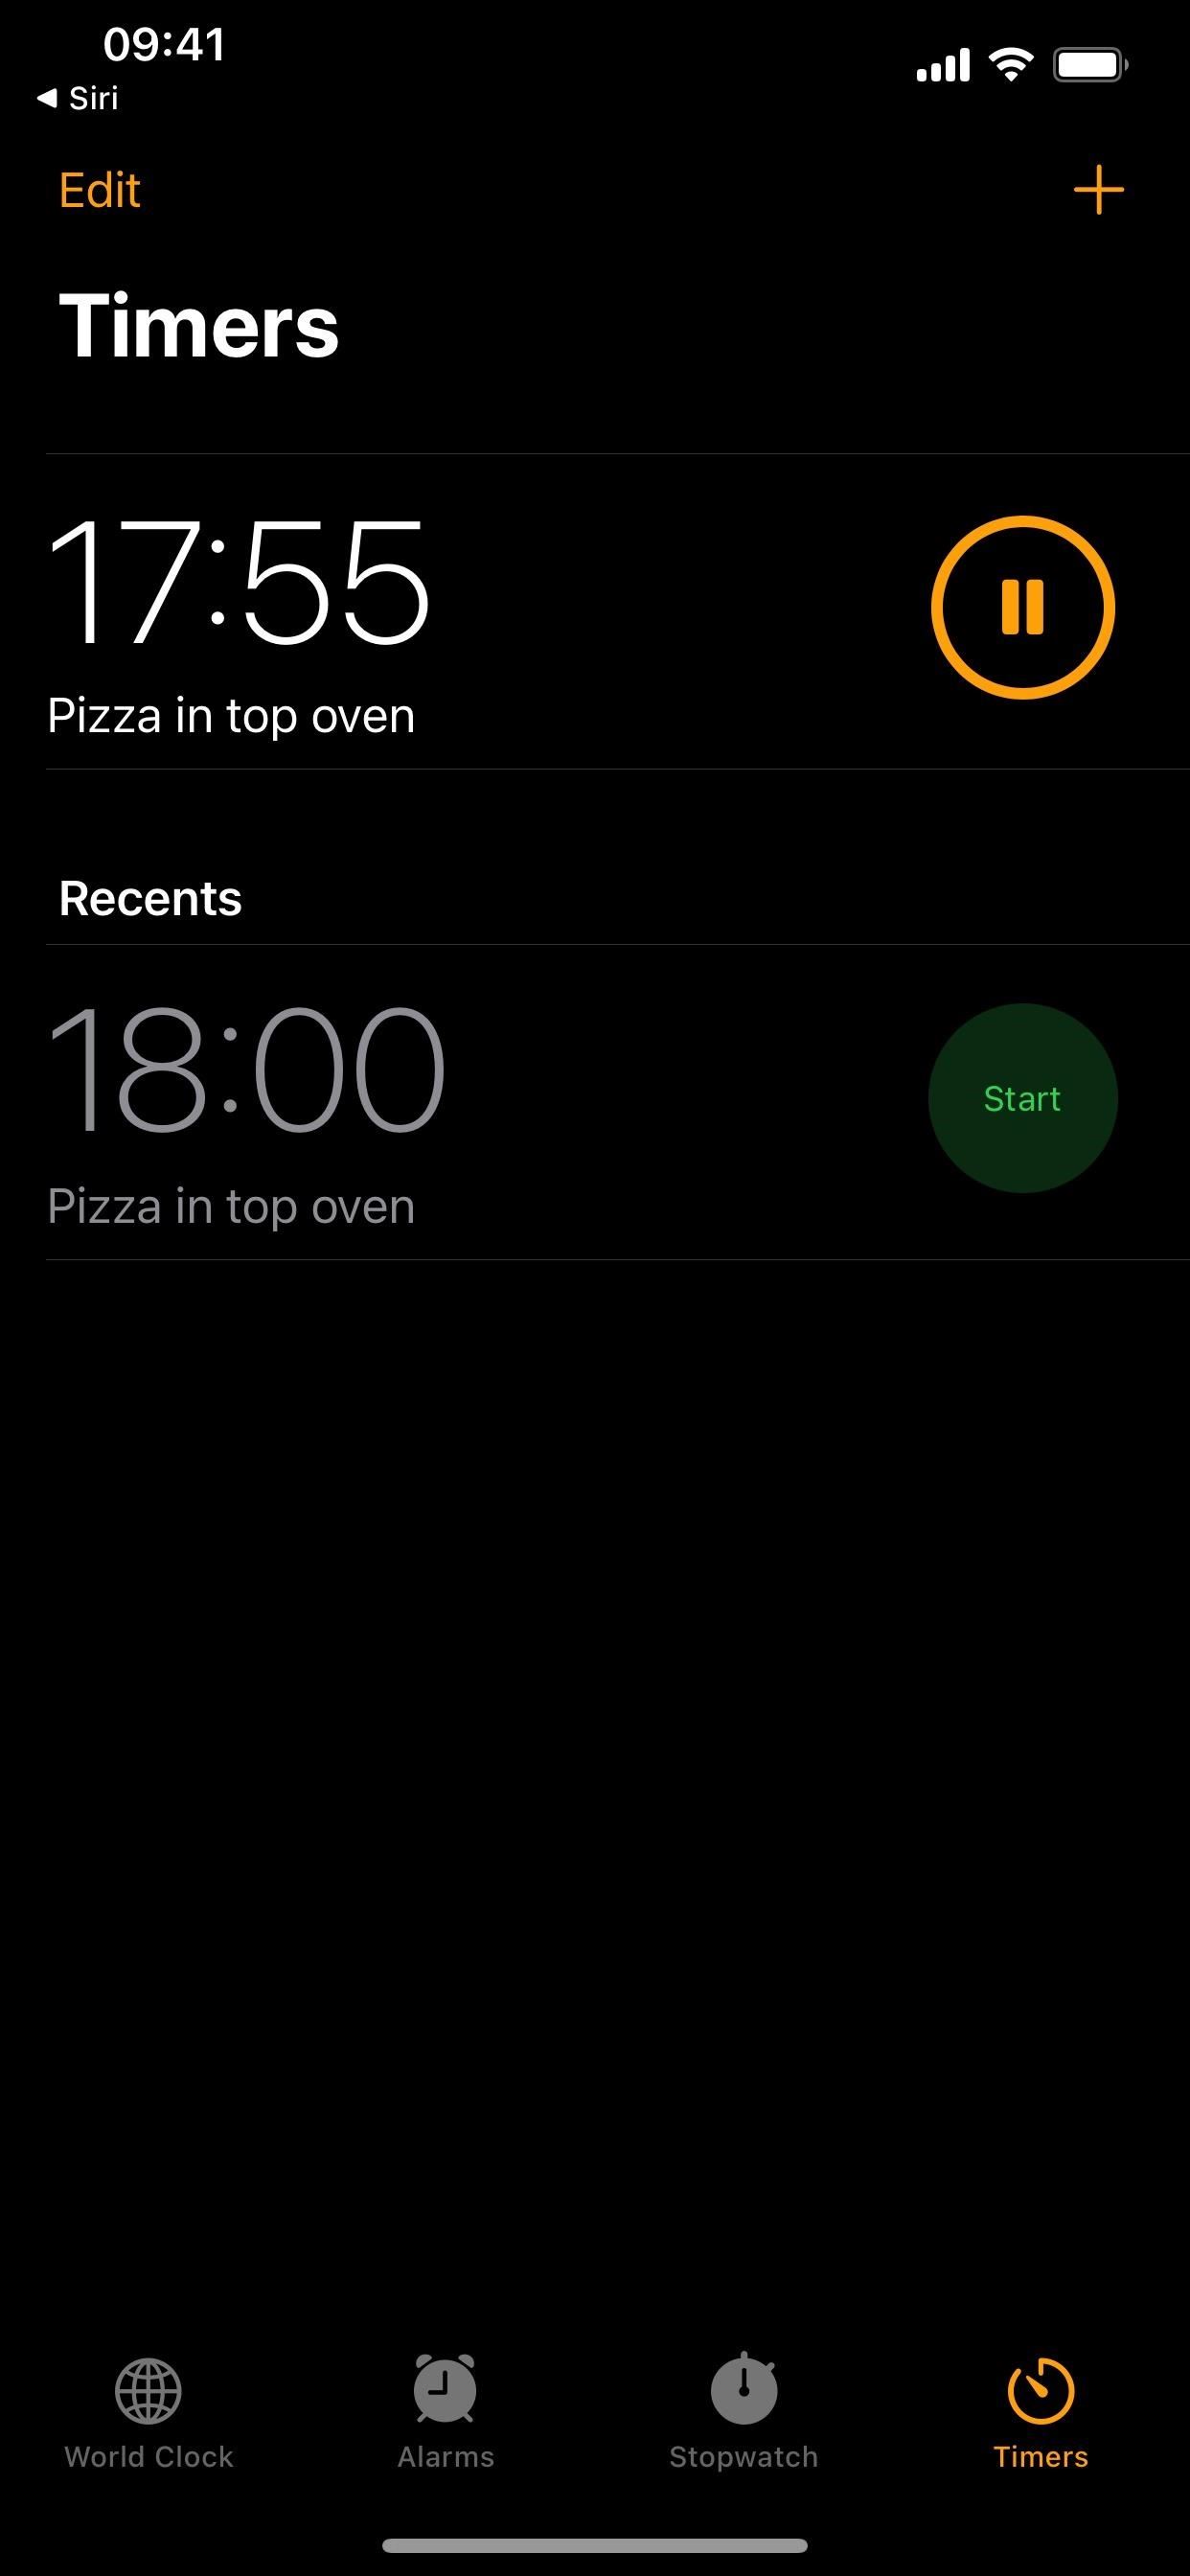
After you hit Start, you’ll return to the main Timers list, where you can view ongoing timers, choose from recently used ones, and add new countdowns. You can have as many timers as you want. I lost count after adding over 40 in a quick test.
If you see a recently used timer that fits the bill, tap the Start button next to it. Otherwise, tap the plus (+) icon at the top. During a timer countdown, you’ll have three ways to start additional timers from the new timer interface:
- Tap a preset timer shown under the time picker interface. These go from 5 minutes to 35 minutes in five-minute increments and aren’t customizable.
- Tap Start next to a recent timer below the presets. Just hit Start next to the one you want. It should retain the same label and sound it had before.
- Tap the plus (+) icon at the top. See Step 2 above.
You can also tell Siri to add other timers, as seen in Step 2 above.
Step 4: Monitor Your Active Timers
To see how much time is left on all your timers, you can open the Clock app back up to the Timers tab. You can also ask Siri how much time is left and view all your running timers as Live Activities on your Lock Screen or in your Notification Center. You can pause and unpause any timer from any of these locations.
Step 5: Stop Any of Your Timers
If you no longer need the timer and it’s still running, you can stop it from any of the locations seen in Step 4 above.
- Swipe the active timer off the screen to the left from the Timers tab.
- Swipe left on the active timer, then tap the Delete button.
- Tap Edit on the Timers tab, hit the minus button to the left of the active timer, then tap the Delete button.
- Tap the active alarm on the Timers tab, then hit Cancel.
- Ask Siri to cancel a specific active timer.
- Tap the X on the active timer from Live Activities. (Don’t swipe left on it since that only removes the Live Activity.)
Step 6: Edit Your Timers
From the Timers tab in Clock, you can tap on any active timer to edit its label or end-of-countdown sound. Changing either of these for the active timer won’t change the one saved in your recents. And from what I can tell, it won’t create a new entry with the changes in your recents list.
Step 7: Delete Active and Recent Timers
If you want to delete recent timers, which may be the case for unlabeled timers or single-purpose timers, you can do any of the following:
- Swipe the saved timer off the screen to the left from the Timers tab.
- Swipe left on the saved timer, then tap the Delete button.
- Tap Edit on the Timers tab, hit the minus button to the left of the saved timer, then tap the Delete button.
- Tap the plus (+) icon on the Timers tab to add a new alarm, then use one of the left-swipe gestures mentioned above.
Keep Your Connection Secure Without a Monthly Bill. Get a lifetime subscription to VPN Unlimited for all your devices with a one-time purchase from the new Gadget Hacks Shop, and watch Hulu or Netflix without regional restrictions, increase security when browsing on public networks, and more.
Other worthwhile deals to check out:


