- On the Windows desktop, press the Windows key and X, then select Windows PowerShell (Admin) from the resulting pop-up menu.
- Alternatively, you can type powershell into the Start menu search box, then right-click Windows PowerShell and select Run as administrator from that pop-up menu.
2. In the Administrator: Windows PowerShell window that appears, type this string and hit Enter: dism /online /cleanup-image /analyzecomponentstore
You’ll see something like what’s shown in Figure 9.
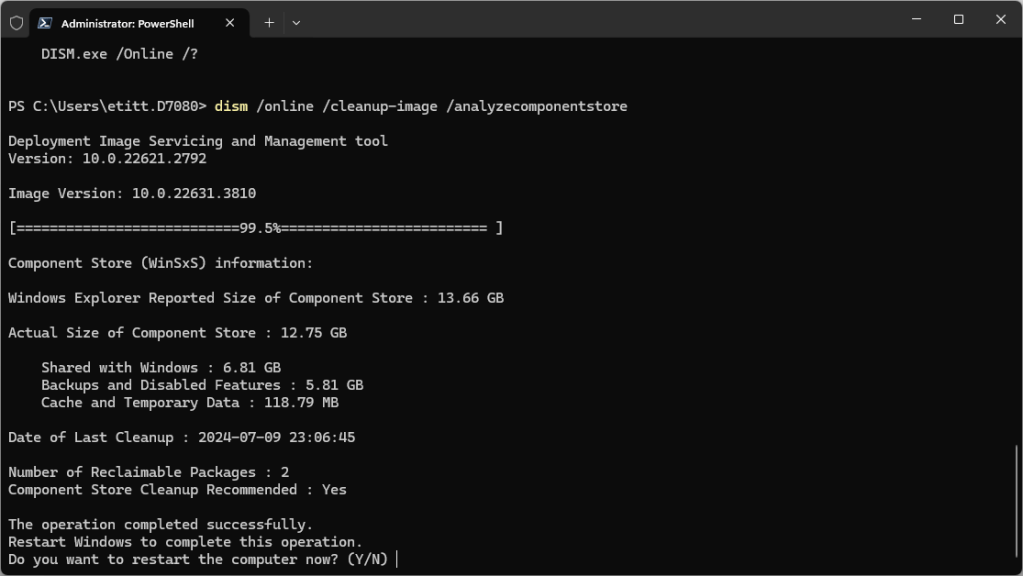
Figure 9: DISM /analyzecomponentstore finds two packages for cleanup (reclamation).
Figure 9: DISM /analyzecomponentstore finds two packages for cleanup (reclamation).
Ed Tittel / IDG
Figure 9: DISM /analyzecomponentstore finds two packages for cleanup (reclamation).
Ed Tittel / IDG
Ed Tittel / IDG
As I wrote this story, I had just installed a Cumulative Update and other update items earlier that week. Sure enough, /analyzecomponentstore reported that there were two reclaimable packages ready for cleanup. Notice that the response text reported “Yes” in the field labeled “Component Store Cleanup Recommended.” That’s your clue that DISM has something it can clean up on your behalf.
3. To make that happen, in the Administrator: Windows PowerShell window, enter this string: dism /online /cleanup-image /startcomponentcleanup
The results appear in Figure 10, with an extra /analyzecomponentstore operation to show the results of the cleanup.
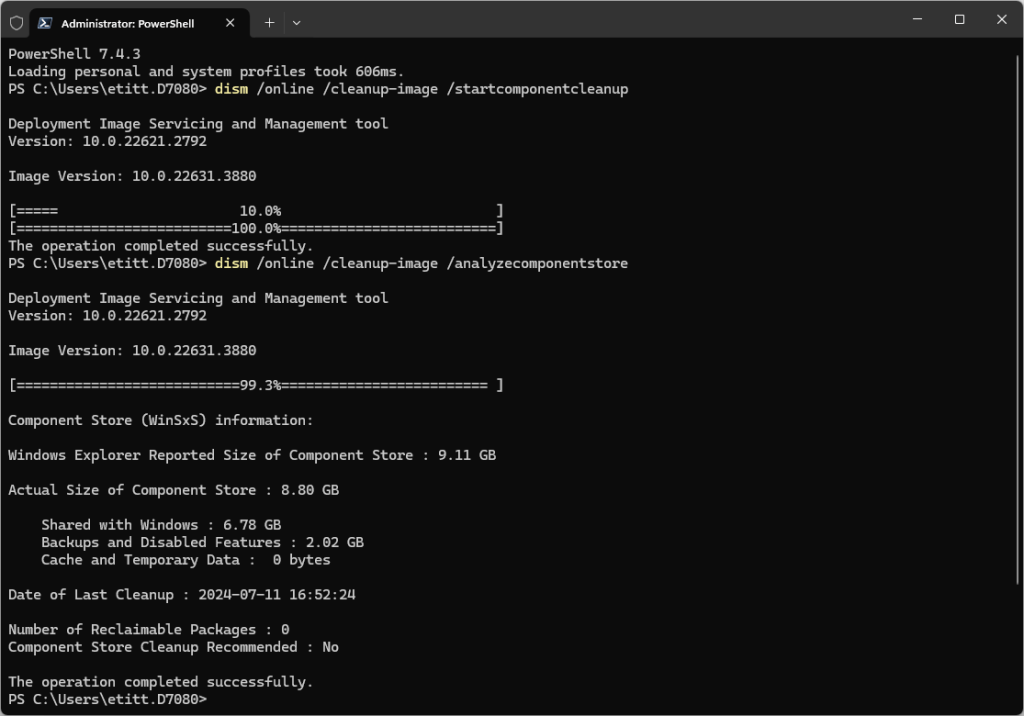
Figure 10: /startcomponentcleanup does its thing, and /analyzecomponentstore shows a reduced footprint and nothing left that’s reclaimable. Good!
Figure 10: /startcomponentcleanup does its thing, and /analyzecomponentstore shows a reduced footprint and nothing left that’s reclaimable. Good!
Ed Tittel / IDG
Figure 10: /startcomponentcleanup does its thing, and /analyzecomponentstore shows a reduced footprint and nothing left that’s reclaimable. Good!
Ed Tittel / IDG
Ed Tittel / IDG
Please note the dual progress lines (the first goes only to 10%, the next all the way to 100%) after the /startcomponentcleanup operation: this is a well-known foible of DISM in x86 Windows versions (both 10 and 11). As far as I can tell, it’s an output glitch. DISM works properly.
Now let’s compare the numbers from the first and second /analyzecomponentstore operations, to wit:
- Size of component store: 13.66GB vs. 9.11GB (diff: 4.55GB)
- Actual size of component store: 12.75GB vs. 8.80GB (diff: 3.95GB)
- Shared with Windows: 6.81GB vs. 6.78GB (diff: 0.03GB)
- Backups and disabled features: 5.81GB vs 2.02GB (diff: 3.79GB)
If you add the savings for “Shared with Windows” and “Backups and disabled features,” you get 3.82GB, which is nearly the savings in the actual size of the component store (3.95GB) — just as it should be. Recently updated systems may recover up to 4 or even 5GB using this technique. (Actual results depend on the number and size of reclaimable packages removed.)
For more incredibly useful things you can do with DISM, see “Why DISM is the Swiss Army knife of Windows maintenance.”
Step 6: Inspect the system drive with WizTree
Once all preceding cleanups are complete, it’s a good idea to inspect the system drive to see where the big files are. I use the free, donation-ware WizTree program, but TreeSize Free is a worthy alternative. Both programs produce treemap diagrams — graphical renderings of disk contents that make it easy to spot big files and folders.
To run a scan of the ever-popular C: drive, here are the steps to follow:
1. Launch the WizTree application.
2. Select the C: (or some other) drive as the scan focus from the pull-down list just below the File and Options menus at upper left (see Figure 11).
3. Click the Scan button to the right of the selected drive. This generates a treemap diagram for the selected drive fairly quickly — usually under a minute, even on ginormous drives. (I just pointed it at a 4TB Hitachi drive and it finished in under 10 seconds.)
Figure 11 shows the C: drive from my Lenovo Yoga Slim 7x Copilot+ PC.
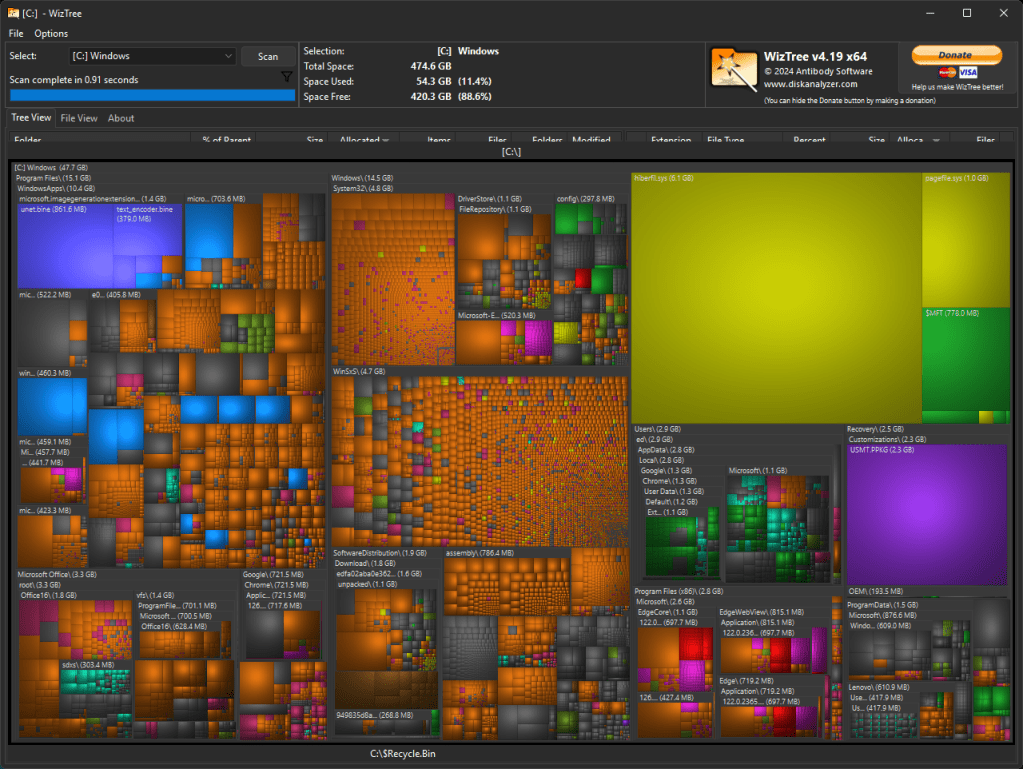
Figure 11: The WizTree drive contents treemap uses box size to show how file (and folder) sizes stack up.
Figure 11: The WizTree drive contents treemap uses box size to show how file (and folder) sizes stack up.
Ed Tittel / IDG
Figure 11: The WizTree drive contents treemap uses box size to show how file (and folder) sizes stack up.
Ed Tittel / IDG
Ed Tittel / IDG
In this situation, you’re looking for big files, because getting rid of them provides useful, quick wins in the disk space recovery game. Right here, I see that the largest files are the ones you’d expect to see — namely, the system hibernation file (hiberfile.sys) and the system page file (pagefile.sys), in yellow-green near center right.
After those behemoths (6.1 and 1.0GB, respectively), the next largest is named USMT.PPKG. A quick lookup reveals this is output from the User State Migration Tool (USMT), used to snapshot Windows app files and settings. According to the Windows community, this information is part of the Windows Recovery Environment (WinRE) and is thus eminently worth keeping around. Indeed, I don’t see any obvious candidates for clean-up in this recently rebuilt Windows installation.
But let’s pick the USMT.PPKG file as an example anyway. Here’s how you’d get rid of it (or stop short, as we will do):
1. Position the cursor over the file of interest: USMT.PPKG, in this case.
2. Right-click to produce a pop-up menu.
3. On the pop-up menu, click Delete (2nd item from bottom) to remove the selected file. We’ll skip that this time.
By clicking other “big blocks” in the treemap, you can quickly figure out where your biggest potential space recovery opportunities lie. You won’t be able to get rid of all of them — the paging and hibernation files must stay, for example — but if some of them can go, big space savings can result.
For me, that’s often Windows ISO files I no longer want or need. (They usually consume 4GB to 6GB of disk space, so each one tossed is a savings in its own right.)
Step 7: Uninstall unused or unwanted Windows apps
If you really want to clear out some clutter on your disk, consider removing apps you don’t use. Here’s how:
1. Click Settings > Apps > Installed apps (in Windows 11) or Settings > Apps > Apps & features (in Windows 10). You’ll find yourself faced with a list of everything that’s currently installed on the target PC.
2. Off to the right of each app, you’ll see an ellipsis. This is Windows iconography that tells you clicking will show more options. Click the three-dot icon next to any app, and you’ll see a pop-up menu that includes some or all of the following options:
3. Getting rid of an app you never use is easy: simply click the Uninstall button.
If you pick the stuff you never use — with certain exceptions, including Microsoft Edge, the Microsoft Store, and the Settings app itself — you can then follow other cleanup recommendations earlier in the story to recover the disk space they would otherwise consume.
The best guidance on this topic comes from Windows 10 Forums and Windows 11 Forum, where you’ll find tutorials that include “uninstall apps” in their titles. Highly recommended to help you pick things to scrap, if you’re of a mind to do so. I remove third-party apps I’m no longer using (as when I switched from WinDirStat to WizTree a few years back), but I prefer to leave Microsoft’s built-in apps alone. Do whatever suits you best.
Practice makes perfect
If you perform such cleanups periodically (I shoot for at least once a month), you’ll be able to keep your space consumption under much better control. Try this regimen out for yourself and you’ll soon see what I mean.
And don’t forget to slog through the Users folder (especially your account subfolder) from time to time, too, because junk too often tends to accumulate there. You can find that folder on your C: drive, where it sits alongside other, well-known top-level folders (e.g., Windows, Program Files, and so forth), as shown in Figure 12.
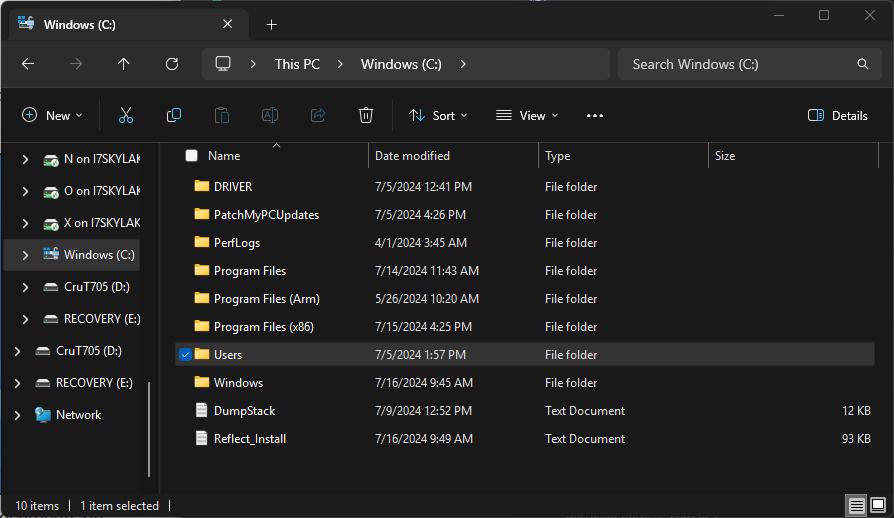
Figure 12: The Users folder is at the top of the C: drive hierarchy, along with Windows, Program Files, and so forth.
Ed Tittel / IDG
After all the work is done, you can then blissfully enjoy your clean machine!
This article was originally published in January 2019 and most recently updated in August 2024.


