What to know
- Device diagnostics in Android 15 is a collection of tests and checks that let you diagnose and identify issues with your phone’s components.
- Device diagnostics lets you run a ‘display test’ and a ‘touch test’, as well as check the health of your battery and storage.
- There’s also an ‘Evaluation mode’ that lets you use one device to assess another device.
- Device diagnostics is available from the Settings > System > Device diagnostics.
When things go wrong with your device, it is difficult to pinpoint and judge exactly what the cause of the issue is. In the long and tricky process of phone repair, being able to diagnose hardware issues is half the battle won. Even though Android does let you check the health of your device yourself, currently the function is limited to the Battery.
Android 15, however, does look to improve upon this. On the new version, you’ll be able to check if any of the main components such as display, touch input, storage, etc. are in need of repair. All this will be housed under a new Settings page called ‘Device diagnostics’. If you’re new to the whole DIY shebang and want to figure out how to start diagnosing what’s wrong with the different components of your Android device, here’s everything you’ll need to know to get started.
What is Device diagnostics in Android 15?
Device diagnostics is a new and more advanced way of checking if there’s anything wrong with the hardware components of your device. With it, you’ll be able to diagnose and test the display and touch input, and check the status of the battery and storage.
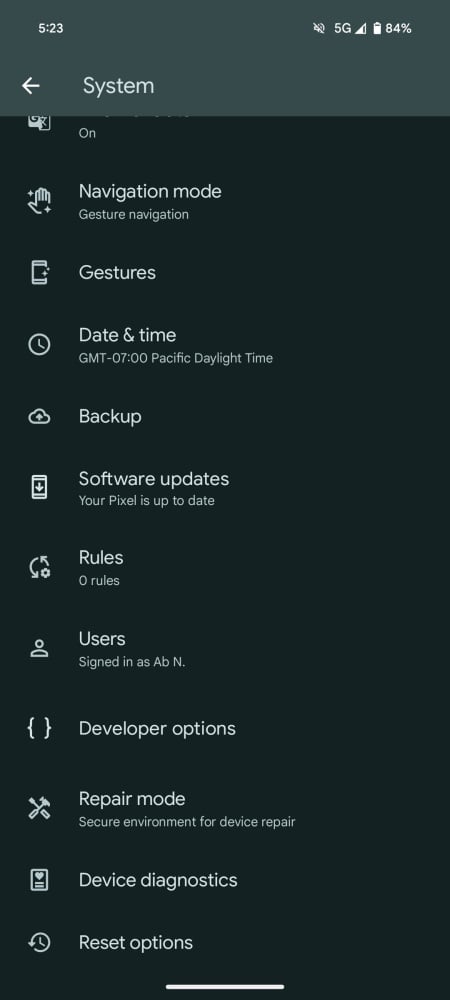
On Android 15, you can access Device diagnostics from Settings > System > Device diagnostics.

Following include the ways in which you can diagnose the different components of your device on Android 15.
Component health
The ‘Component health’ option is where you’ll find most of the tests and status checks.
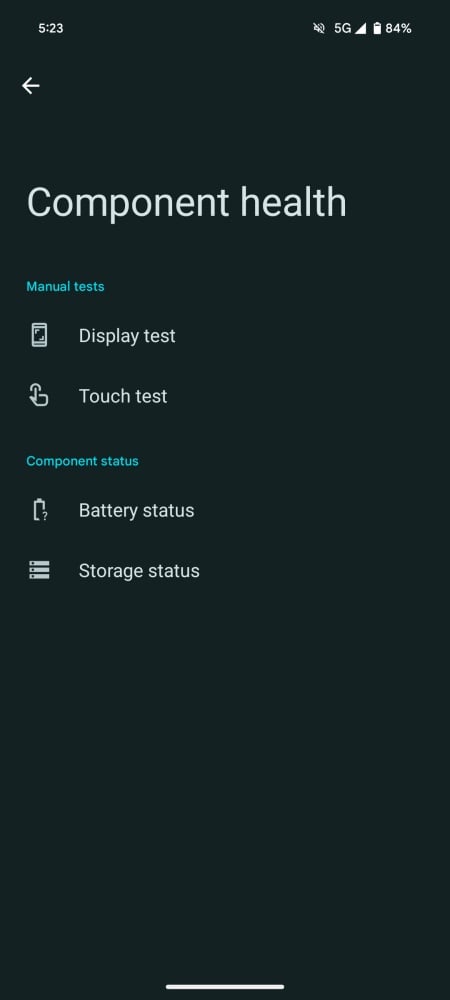
Manual tests
There are two manual tests that you can conduct: Display test and Touch test.
When you start the Display test, the screen cycles through red, blue, and green screens. These basic colors make it easy to spot any issues that the screen might have, such as screen bleeding, dead pixels, and screen burning. Although each of these issues has its own tell-tale signs, the main idea is to look for areas that look ‘off’. This could be spots, blotches, color-less, and off-color areas. Depending on how serious the issue is, you can determine whether or not you want to give your local repair shop a visit.
The purpose of a Touch test is to find out the areas where the touchscreen is not responsive. The test itself is fairly easy to conduct. You follow a path on the screen with a finger and check if there’s any region where the screen fails to detect the touch. If you are able to get a continuous line, all’s well with your touchscreen.
If there are interruptions, however, it doesn’t necessarily mean something’s wrong with it. There’s every possibility that the interruption came about because of dirt or grease. So make sure to wipe the screen before starting the test and conduct it a few times. Only if you find the interruption again and again around the same area can you be sure that something’s wrong with your touch screen.
Component status
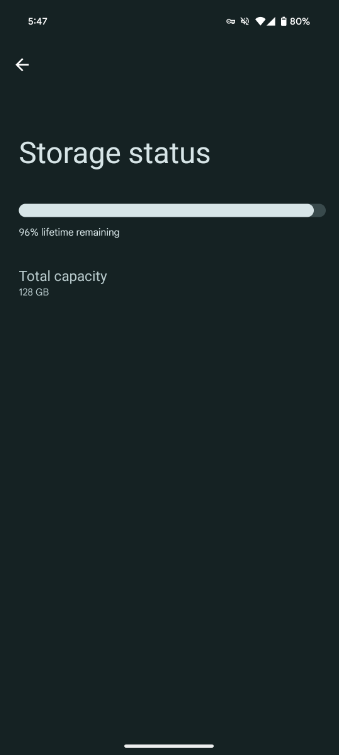
This section is where you can check the health status of your device’s battery and storage. One thing to note here is that the percentage for both of these is bound to diminish over time. So unless your device is fairly new, expect these two to be less than a hundred percent. But how do you know when it’s time to get replacements or repairs?
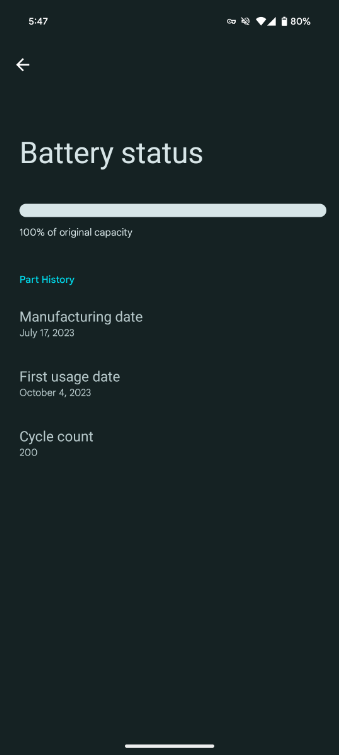
As a general rule of thumb for the battery, anything above 80% of original capacity does not need replacements. Depending on the size of the battery, you could even have it at 75% and not need replacements. But anything lower is bound to become problematic and will lead to a big drop off in terms of capacity.
On the other hand, the storage health is not so easy to decipher. The percentage determines how quickly your device can read and write data relative to when the phone was new. But there’s no exact percentage when you need to send for repairs. Ultimately, it’s all about real-world usage and feel. If you sense your device has gotten much slower than before, then that’s when you need to visit the repair shop.
Evaluation mode
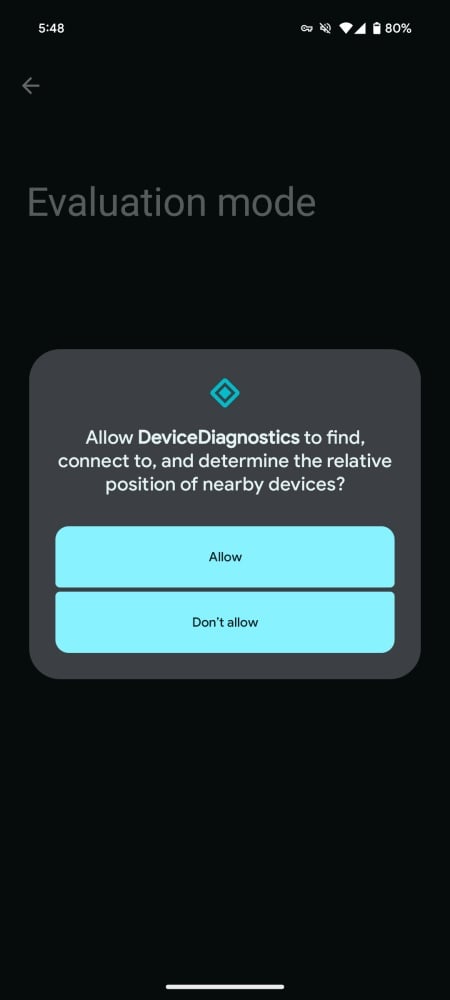
The purpose of Evaluation mode is to use one device to test and check the status of another device’s components. Here, you’ll have two options: Trusted device and Evaluated device.
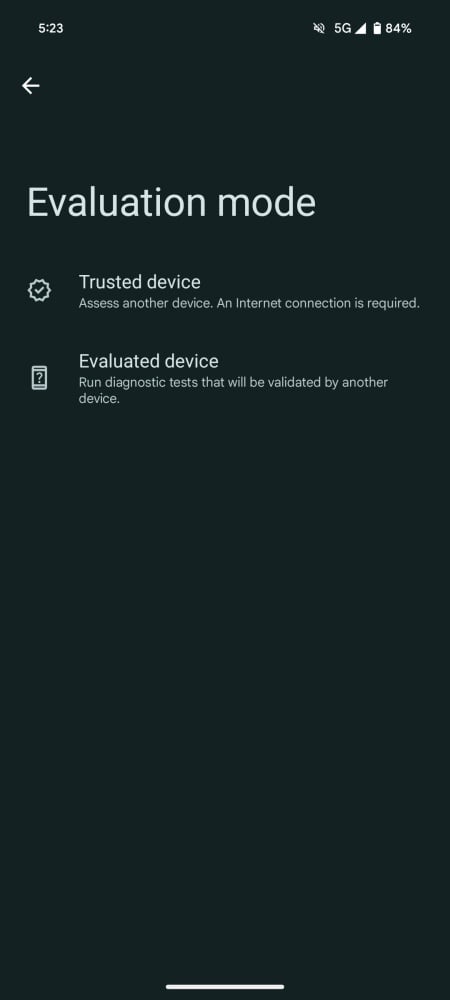
Trusted device allows your current device to assess another device, while Evaluated device runs diagnostic tests on your current device so that it can be assessed by the another device.
To use these options, you will require internet access, Nearby devices permission, and will need to scan a QR code for the other device.
Cumulatively, all these options go a long way in helping the user figure out if something’s the matter with their Android device. Of course, even if ‘Device diagnostics’ is implemented fully in Android 15 (expected release in August), it wouldn’t necessarily be the panacea for all issues with your Android device. You will still have to get professional help for most of your smartphone repairs.
Nevertheless, the inclusion of additional component diagnostics is a step in the right direction. Users can at least keep tabs on the health of their device and find out when and where things are beginning to go wrong. The importance of an early diagnosis can hardly be overstated.


